Sitedropper is available at https://mcp.sitedropper.com/mcp. Add it to the client you use, reload the client, then sign in and approve scoped access in your browser on the first tool call.
Claude Code
Run this command from a terminal where Claude Code is available.
pi install npm:pi-mcp-adapter
# .mcp.json or ~/.config/mcp/mcp.json
{
  "mcpServers": {
    "sitedropper": {
      "url": "https://mcp.sitedropper.com/mcp"
    }
  }
}
On first use, your client opens Sitedropper in a browser. Sign in and approve access there; never paste approval codes or tokens into a prompt.
Make the first deployment safe.
For static front ends, build locally before you package the project. Ask the agent to upload the built output, use Draft visibility, and wait for the deployment to finish through Analyze, Build, and Deploy. A successful result returns the live URL.
Safe first prompt
Deploy this project with Sitedropper. Build it locally first if it is a static front end, keep the deployment Draft, poll the operation until it finishes, and give me the live URL.
How deployment works
Sitedropper checks the project, prepares the build, and makes the finished site available at a generated HTTPS URL. The deployment keeps its progress together so you can see what needs attention.
Upload a ZIP from the dashboard.
ZIP upload is the direct browser workflow. For a prebuilt static project, put the contents of the output directory at the archive root so index.html is immediately available. A hand-authored site may instead contain one standalone .html file; Sitedropper uses it as the home page when index.html is absent. Keep secrets out of the archive. This browser workflow does not expose runtime environment or command controls in Project settings.
ZIP deployment at a glance
01
Build and ZIP locally
Build and packageReady
Site
↓
ZIP
✓ Site packaged as project.zip
Run the production build, check the result in your browser, then package the deployable project with the site files at the archive root.
Site → project.zip
02
Upload directly to Sitedropper
Direct ZIP uploadUploading
ZIP
→
Sitedropper
✓ Secure browser handoff
Drop the archive into your project. No agent connection or repository import is required.
project.zip → secure upload
03
Sitedropper prepares your site
DeploymentComplete
AnalyzeComplete
BuildComplete
DeployComplete
Progress100%
Sitedropper checks the project, builds what it needs, and makes it available at an HTTPS URL.
Review the Sitedropper URL, then choose the sharing level that fits your audience. Eligible accounts can also connect a supported custom subdomain.
URL ready · sharing is your choice
Complete the four dashboard actions.
Create a Draft project, upload the archive, wait for the deployment to finish, and inspect the result before changing visibility.
The dashboard screenshots use fictional project and account data. Yellow outlines identify the documented controls.
01
Create a project
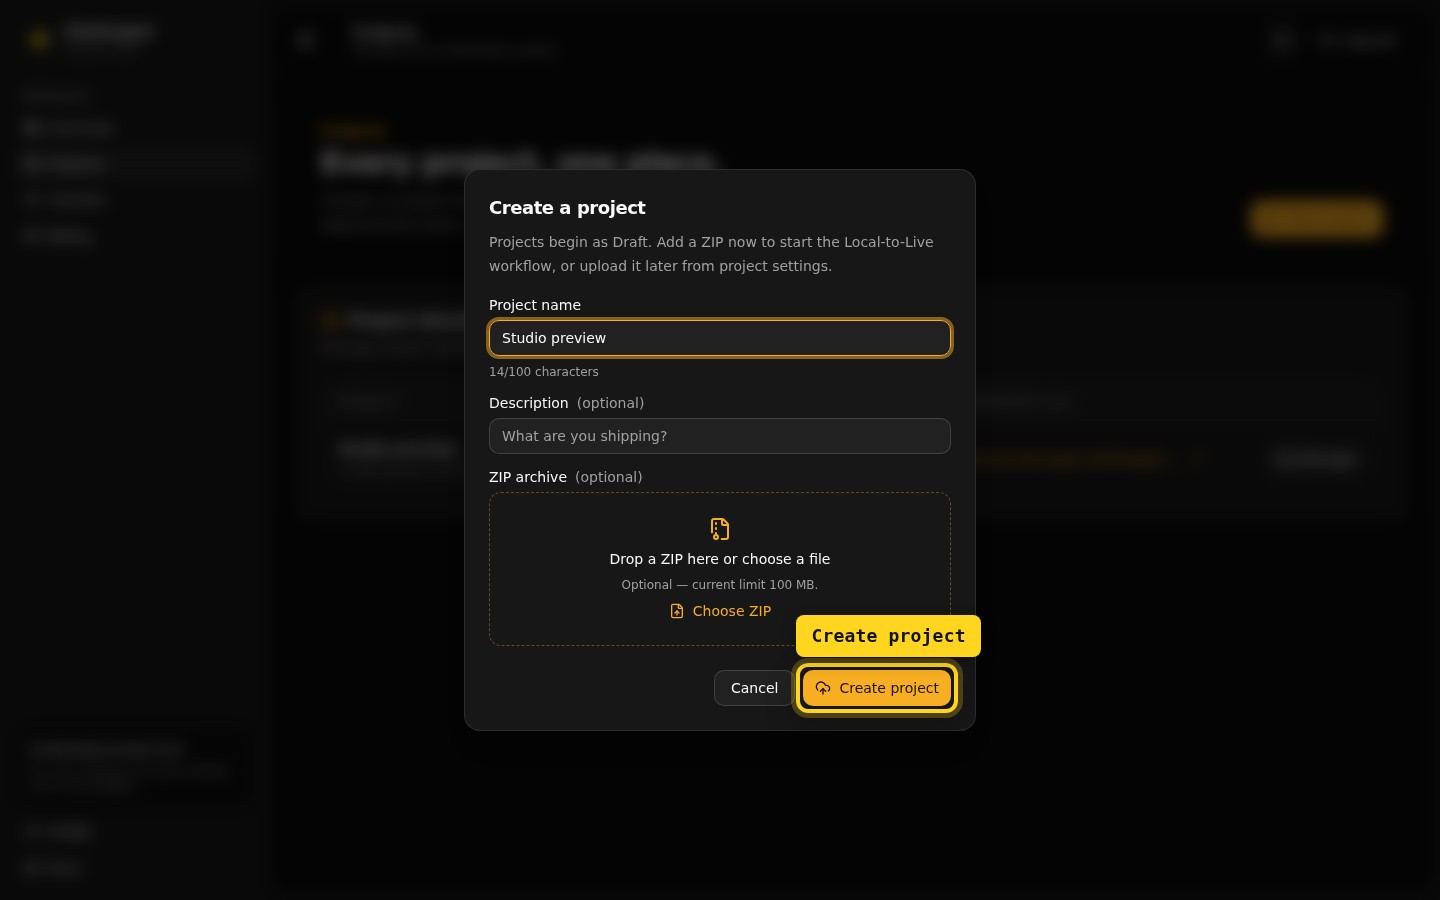
Open Projects, choose New project, enter a name, and select the highlighted Create project action. New projects begin as Draft.
Create a project in the current Sitedropper dashboard. Select the image to enlarge it.
02
Upload the ZIP
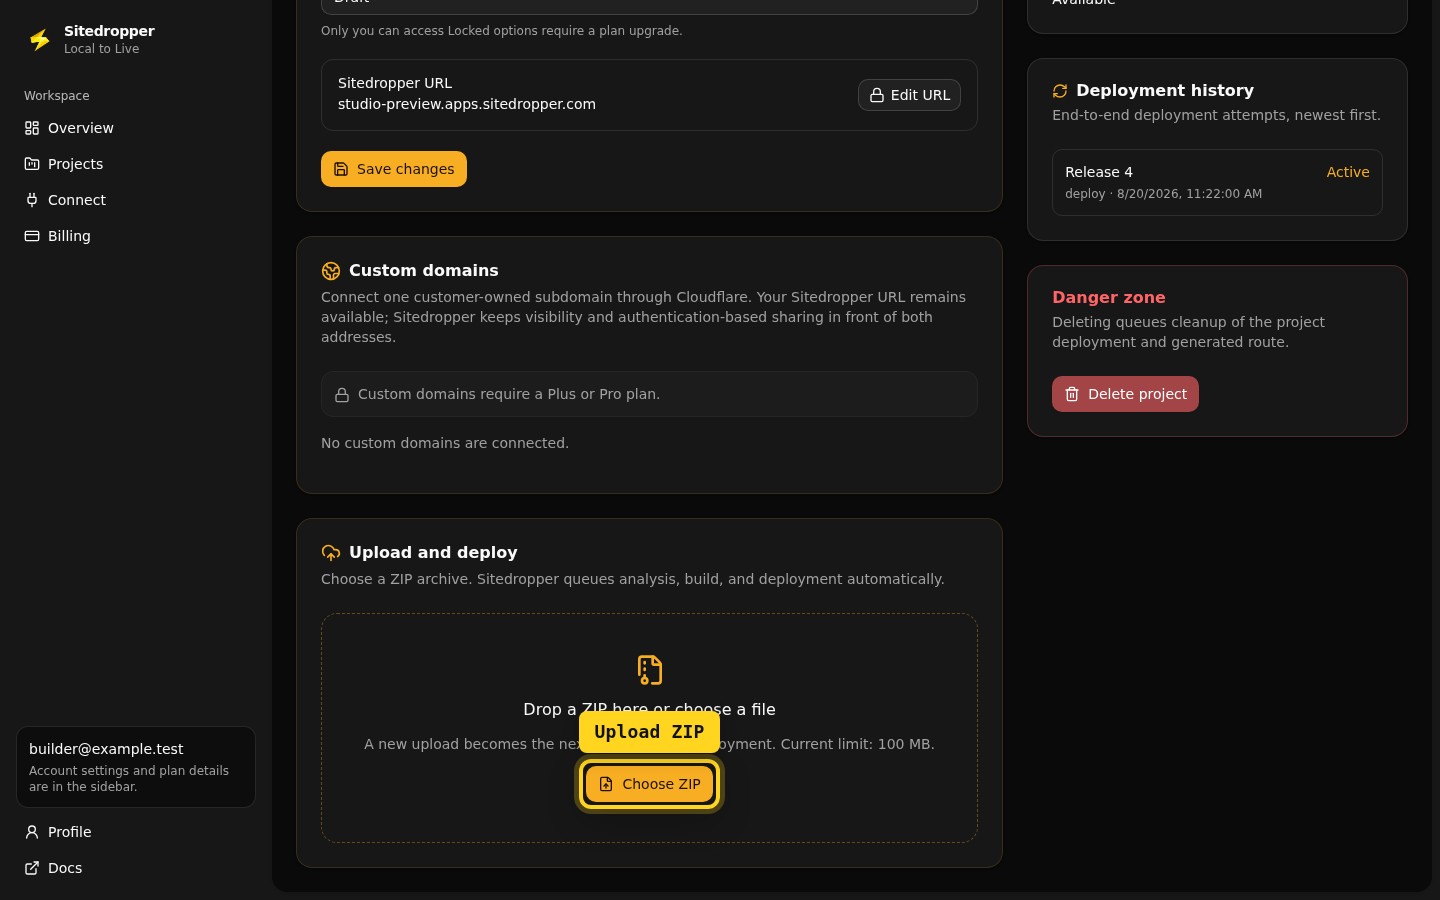
Open the project’s Upload and deploy card, then select the highlighted Choose ZIP control or drop the archive into the same area.
Upload the ZIP in the current Sitedropper dashboard. Select the image to enlarge it.
03
Open the deployed site
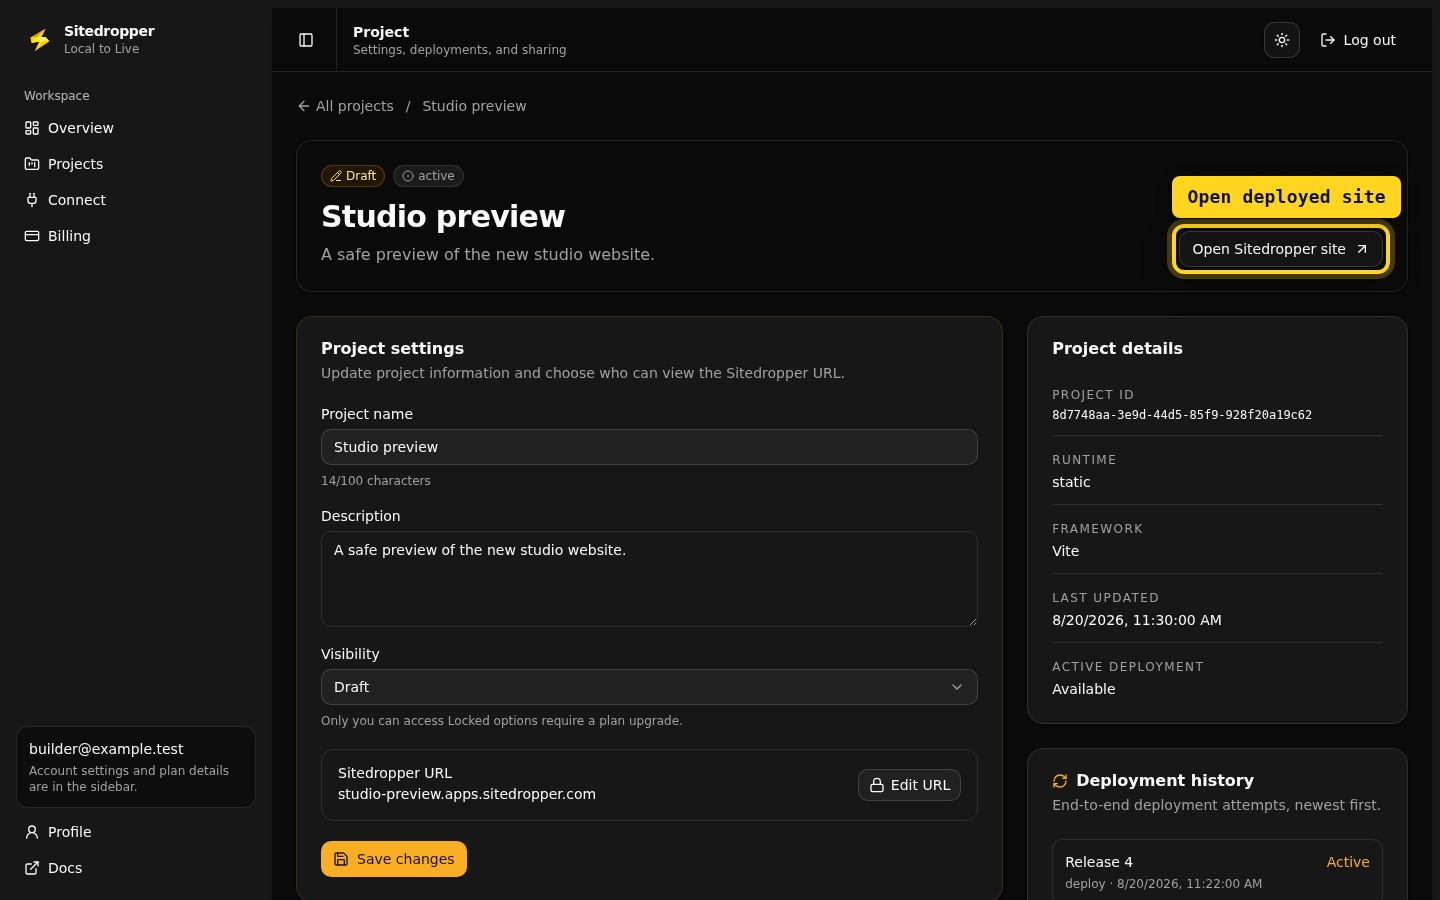
Wait for Analyze, Build, and Deploy to finish. Then use the highlighted Open Sitedropper site action to review the generated URL.
Open the deployed site in the current Sitedropper dashboard. Select the image to enlarge it.
04
Change visibility to Public
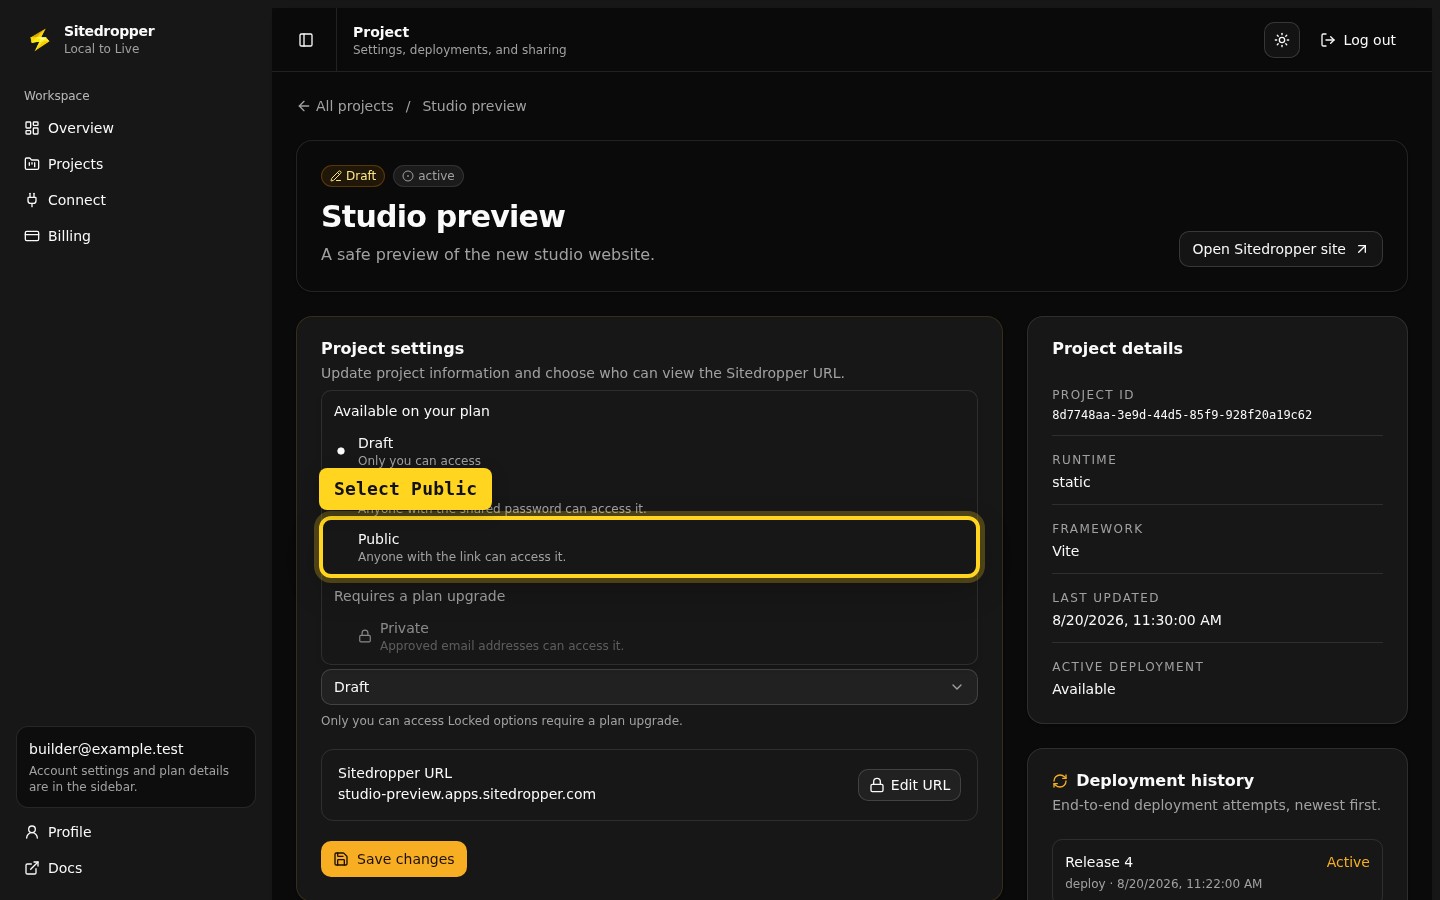
Open Visibility, select the highlighted Public option, review the access warning, and save the project changes only when anonymous access is intentional.
Change visibility to Public in the current Sitedropper dashboard. Select the image to enlarge it.
Create a scoped REST API credential from Profile, store it securely, prepare an archive upload, keep the returned operation ID, and poll it until the deployment finishes. Dashboard sessions and MCP credentials are separate from REST API credentials.
Verify a REST API credential
curl -X GET "https://api.sitedropper.com/api/v1/me" \
  -H "Authorization: Bearer $SITEDROPPER_API_TOKEN"
Do not assume databases, persistent volumes, cron jobs, background workers, multi-container applications, multi-region deployment, runtime log retrieval, or rollback controls are available. Starter, Plus, and Pro accounts can connect supported customer-owned subdomains; the generated Sitedropper URL remains available on every plan.
Troubleshooting a deployment.
Start with the deployment step: project checks catch archive-shape problems, build output identifies dependency or command issues, and deployment status shows the final handoff. For static projects, confirm that the selected root contains index.html or one standalone .html file.
For detailed current behavior, use the stable, categorized API reference.